Showing posts with label make up. Show all posts

Friday, 19 May 2017

Dramatic Halo Eye Make up | NYX Glitter Pigment Review

Halo eye pigments

Glitter is having a little moment in the make up industry right now. From OTT glitter cut creases dominating instagram, to covering dark under eye bags with glitter and products like unicorn snot and space jam popping up all over the place it's difficult not to be drawn in. Unfortunately for me glitter, more specifically glitter pigment, has been something I haven't had a great deal of experience with as a make up artist - which is a shame because I'm a fan. So in the last month or so I have been taking steps and working to change that and decided to pick myself up a couple of purse friendly pigments by my new high street fave, NYX cosmetics.

Unfortunately I still had to purchase these online, as my local Boots stores were either consistently out of stock or simply don't take them in very often. None the less I persevered and sucked up the 3 day delivery and I was granted my glittery wishes.

I decided to pick up 3 pretty subdued, more metallic shades, Vegas BABY! (which is a subtle sandy gold colour with hints of silver) Old Hollywood (a true gold) and Magnetic (a true metallic silver shade) All of them come in pretty small, dinky tubs (0.04oz), I'll be honest I was expecting more for £5.50 per pot but no matter I'm hoping these will last a good while.

I decided to give these a bash with a smokey, halo eye one day when I was having a practice with some new products and I decided to reach specifically for Vegas BABY! to help give me that brightness in the middle of my lid as is expected of a halo eye.

Glittery halo eye

The pot looks a little like a salt shaker so I shook some of the product into the lid, which admittedly was not easy and it took a good few shakes to get out a decent amount of product, I'm not sure if I'm doing something wrong but I couldn't get the lid off entirely at all! I then went in with a rounded, synthetic fibre brush with a little of NYX's Glitter Primer on it, picked up and packed the product on to the middle of my lid. It didn't take very much to achieve the effect I was after - the pigments are relatively fine so there wasn't a great deal of fall out and I was very impressed with the colour pay off!

The next time I use these I will instead be reaching for some of my setting spray or MAC Fix+ as I feel it may be a bit easier to pick up the product and pack it on using a slightly fluffier brush - though this is more of a criticism of the glitter primer than anything else. As I mentioned I am still disappointed in the size of the tubs, they will go nicely in my collection and not take up very much space however I still expected a bit more, and of course I don't very much like the salt shaker type lid - I would far rather have the option to take the entire lid off and spoon the product out for something quicker and easier.

If you are looking for a more purse friendly pigment than the likes of MAC, LA Splash or Illamasqua then head over to your local NYX counter and give these a bash - once you get the product out they are great to work with and the colours they offer are amazing!

Be sure to leave any comments or suggestions in the box below, otherwise you can catch me on the usual channels, Twitter, Instagram, Facebook for more make up artistry by me and more of everything else on Bloglovin.

Until next time,

H.Elizabeth x

Wednesday, 17 May 2017

No Fuss Brush Cleaning Routine | Freedom Studio Solid Brush Bath Review

I may be the most easily influenced person on the planet. There I was quite content with my tried and tested brush cleaning routine (baby shampoo with a spritz of alcohol to disinfect and a blender cleanser for reusable foam sponges) when all of a sudden up pops THIS video by Andrew of Beauty and the Boy on Instagram showing, perhaps the easiest brush cleaning routine I have ever seen featuring this brush bath by Freedom Pro Studio.

No sooner had I clicked the like button than I had bought the solution to try for myself, and I must say if you're a no fuss, no muss no coconuts kind of person this may be the brush bath you've been searching for.

This sanitising brush cleanser works by swishing around your 'dirty' make up brush in some water, swirling it around in this little brush bath and rinsing the soapy solution (and make up residue) off under a running tap. And that is literally it! So in short, swish, swirl, rinse (trust me it's not a magic spell as much as it sounds like it!) 

Cleaning my brushes with this isn't a thought like it normally is -it is so quick and easy, it gets the job done and it helps in making your brushes smell lovely and clean. 

I of course always finish off my brush cleaning routine by leaving the brushes over night hanging over the edge of a counter on a dishtowel - this helps them maintain their shape and dry all around and top them off with a spritz of alcohol solution to ensure they are thoroughly disinfected.

The Freedom brush bath  retails at £7.00 for a 100ml tub - a little of this product really goes a long way and I can see myself using this for a long, long time to come. If you're looking for a cost effective, no fuss, no muss cleanser for your brushes I really do recommend checking out the Freedom range at your local Superdrug you really don't have to pay the world for an effective cleanser as some would have you belieive!

Hopefully you have enjoyed checking out this new product with me, be sure to let me know in the comments below if you do decide to give this a bash - at £7.00 for me it was a no brainer considering how often I wash my brushes! Otherwise you can catch me lurking on all of the usual channels, Twitter for rants and musings, Facebook for make up artistry, Instagram for snaps and more from the blog on Bloglovin.

Until next time,

H.Elizabeth x

Friday, 2 December 2016

I'm Your Venus | Lime Crime Venus: The Grunge Palette Review


Having heard a great many mixed reviews about Lime Crime in the past, I kept my distance opting instead for tried and tested brands that grace my usual beauty sites, Beauty Bay, Sephora etc. It wasn't until this season when I  saw some of my favourite make up artists donning these shades and at a time when I myself was getting very, very into my warm tones, smokey reds and browns that I turned to Lime Crime. 

It was around one week before Lime Crime launched on Beauty Bay that I bought this palette (typical I know!) I bought it as part of a bundle in which I got the palette and their highly coveted liquid lipstick in the shade 'Wicked' which I thought was fairly apt for the time of year I was buying it (October/Halloween/Spooky times in case you were wondering.

The shadows as you can see are highly pigmented but are obviously best applied with a brush - the swatches above I don't feel are truly representative of how well the shadows appear on the eye and how well they blend into one another, though for a single swipe of the finger into each shadow I don't think they did too badly! My favourite and go to look of the moment with this palette is a crease of Creation and Muse, darkened up on the outer corner with Icon, with a touch of the rose shimmer of Venus and of course Aura on my inner corner.

Overall I do think this palette is value for money (considering it's only £27.67 AND it's Vegan friendly), especially as I use at least one of these colours on a daily basis and it'll be great come Spring and even Summer when I can use shades like Aura, Shell and Divine to create lighter and more 'fun' looks. All of that and you know...it looks great on Instagram!

I hope you have enjoyed my short and snappy review of the Venus Grunge Palette by Lime Crime, as a brand of course they do tend to attract a lot of negative press and heat for things they did in the past however simply judging by their products and nothing else then I'm suitably impressed!

If you want to see any looks I do using this palette be sure to leave a comment below, or you can see some of my most common and loved looks on Instagram, Twitter or even Facebook if you fancy!

Until next time folks, I'm your Venus and your fire!

H.Elizabeth x

Wednesday, 2 November 2016

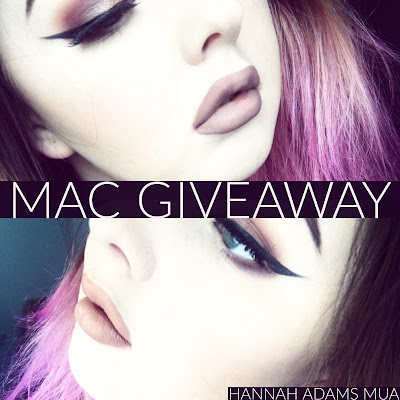
MAC Facebook Giveaway | Hannah Adams Make Up Artistry

MAC Lipstick giveaway

In celebration of reaching 500 likes on my business Facebook page and the relaunch of Hannah Adams Make Up Artistry following our big move in September I'm hosting another MAC giveaway.7

How to enter:

Visit my Facebook page right here to enter, all you have to do is like my page, the post and comment which MAC lipstick you'd like, to be in with a chance of winning!

Thank you again to all of you out there keeping up with my weekly beauty and make up artistry shenanigans right here, and of course everyone along the way who has supported my new venture. I hope to have lots and lots of big news and updates for you in the coming months as I'm working alongside new businesses and really trying to give it my all, but for now good luck in my second MAC giveaway and be sure to find me on the usual channels, Twitter, Instagram, Bloglovin' and of course Facebook.

Until next time folks, 

H.Elizabeth x


Sunday, 30 October 2016

This is Halloween | Scary Skull Make Up


For a few years now I have been interested in character and SFX make up but I just never had or found the time to have a dabble myself. I marvel at make up artists on You Tube with their spooky special effects, melting faces, nails through noses and let's not forget the zipped faces (though admittedly some of these I'm a bit too squeamish to try out on myself) This year however, continuing with my endeavour to improve my overall skills as I venture forth into make up artistry-dom I set aside a bit of time at the weekend to play around with a few of my new make up goodies from this post right here.

This year the most popular Halloween inspired make up seems to be skulls, half skulls, melting skulls, sugar skulls you name it you can't move on instagram for seeing skulls. So I decided to be oh so different and do a half skull, half vintage inspired make up look for Halloween party number one of the season! 

The products I used to achieve the above look (the skull side!) were:

  • Generic brand black liner pencil to mark out the 'black areas' including my eye socket, my 'cheekbones' the teeth and to mark our one half of my face.

  • Snazaroo facepaint in plain white to go all over my face, which I applied around 2 / 3 coats to give it a less sheer quality and more opaque and 'bone like' appearance.
     
  • Snazaroo facepaint in black to carve out the mouth, teeth, fill in the eye socket (not the lid or waterline!) and mixed together to create a bit of shading for the jaw and teeth.
     
  • Black eyeshadow to go over the eyelid and give a bit of dimension to all of the little details like the teeth, nose, eye socket etc.

Of course it isn't perfect, but for a first attempt I'll say it wasn't half bad and I had so much fun playing with brand new products and you know...scaring my husband when he came home from work that day! I managed to create this look in around 20 minutes for the Aberdeen Bloggers Halloween Party (Aberscream) when it rolled around last week and I'm planning on giving it another go this weekend for our besties annual Halloween party.

Though this of course wasn't a tutorial or review of some sort I thought it might be nice to continue this weeks Halloween theme and just share a little bit of what I'm up to as I don't often do that anymore, hopefully you've found this interesting, learned something new or at least got a little into the spooky season. If you want to keep up to date with my latest looks, posts and every other little thing you can find me on Twitter, Instagram and Bloglovin.
 

Until next time folks, stay creepy.

H.Elizabeth x

Wednesday, 26 October 2016

This is Halloween | Halloween Make Up Haul

Make up haul

As a kid Halloween was not my thing. After a traumatic experience where I had a panic attack at a party in my plastic bag costume, in addition to my mum (falsely) telling me I was allergic to Halloween make up, I hung up my cat ears and whiskers and declared the seasons activities were not for me. Things of course changed as I got older and now I grab pretty much any opportunity to dress up and be my witchy little self.

And this year given I have gotten even more into make up artistry than ever, I decided why not give some of those Halloween make up tutorials a bash? And with that I headed into my local Halloween HQ store and of course Boots, and stocked up on the essentials.

Snazaroo Face Paint black and whiteI'm planning on using these two pans for detail work, the paint is quite thin so not really up for an expasive area.

Snazaroo Clown Make Up in whiteThis is a thick, heavy duty cream make up, designed for large, full coverage areas you know like my chubby cheeks!

Nyx Eye Primer in blackThis is going to be great for blackening my eyes for sallow, creepy looks. Or detail work should the paint fail me!

Nyx Eye Liner in black and whiteInstead of simply using these for Halloween looks, I'll use these for a variety of looks throughout the year.

Barry M Lipstick in blackThe HARDEST thing to find in the beauty world ever!

I'm looking forward to seeing just what looks I can create with these few bits and pieces, I'm also debating picking up some spirit gum, liquid latex and fake blood but for now I think I'll see just how I get on with paint - and see if what my mum told me as a child really was true! Be sure to keep an eye on my Twitter and Instagram pages as well as my make up artistry Facebook page to see what I'm up to looks wise and just what I am able to achieve (as a virgin SFX'er) Have you been experimenting with SFX and Halloween make up recently? Be sure to leave links to your looks in the comments below and share the spooks!

Until next time folks, stay creepy!

H.Elizabeth x

Wednesday, 19 October 2016

Copper Smokes | Autumn Eye Make up Tutorial

Autumn Copper Make up geek

Some like copper in their homes, some like copper accessories, phone cases, key rings, jewellery etc. Me? I like copper where you can see it, right on my eyeballs (or thereabouts) So today I'm bringing you my first ever make up tutorial featuring some of my favourites by Bobbi Brown, Make Up Geek and one of my fave tubers Manny MUA (and of course...lashes, lots and lots of lashes!)

Make up geek

1. Make up Geek X Manny MUA Cosmopolitan & Frappe
Use Cosmopolitan to define your crease using a fluffy brush in light sweeping motions to build up the colur - this will be your transition shade.
Darken up your crease with the shade Frappe using the same fluffy crease brush.

2. Make up Geek X Manny MUA Mars & Aphrodite
Using a smaller domed brush sweep Mars along the crease and lightly in the outer corner of your eye, blending with your larger fluffy brush when required.
Using that same brush go over your outer corner and crease with a touch of Aphrodite and blend as required again.

3. MAC Fix+ & Make up Geek X Manny MUA Luna  & Artemis
Spritz a flat shader brush with MAC's Fix+ (not a necessary step but helps the pigment come through more vibrantly) and pack on the shade Luna from the middle of your eye to your inner corner.
Blend together your outer corner and your mid shades with a small, dry shader brush.
Highlight your inner most (demons) corner with a light dusting of Artemis.

4. Make up Geek X Manny MUA Mars & Aphrodite
Using a pencil brush pick up a light dusting of Mars and Aphrodite then drag ad blend this underneath your eye - just under the waterline. You can take this as far along as you like, I personally always go halfway along as I feel it opens my eye up that much more.

5. Bobbi Brown Longwear Gel Liner in Black Ink & Mascara
Use a damp winged liner brush to line the top of your eyelid and create a 'cat eye flick' then use your favourite mascara (I use both Arbonne Mascara and Benefit's Roller lash) to make your lashes blacker than black.

You can then finish off your look by applying a set of your favourite false lashes, here I have used Eylure Definition Lashes in style 121.

Now you're all set to conquer those dark autumnal nights, sparkling, shining and wearing copper in a brand new way (also you may even now be able to match those oh so chic homewares and accessories we spoke about earlier!)

Hopefully you have enjoyed my first ever eye make up tutorial, I post looks like this all the time over on my Twitter and Instagram so do comment below or even on the socials if you'd like me to do another. Otherwise I thank you for taking the time to paroose this particular post and I look forward to catching you on the next one.

Until next time folks, colour me copper!

H.Elizabeth x


Wednesday, 12 October 2016

Cleaning your Beauty Blender | Liquid Blender Cleanser Review


How sad do you feel when you have to chuck your beauty blender? Or perhaps more accurately your Real Techniques Complexion Sponge when it gets grotty beyond repair? Suddenly your baby shampoo and squeeze hack simply isn't cutting it any more and it looks like it's time to retire your tried and tested friend to the bin, really I must have gone through at least a dozen beauty blenders only to find I ended up with a sponge that was more foundation than foam. So getting sick, tired and fed up of wasting so much money I began to seek other cleaning methods of my spongey compadre and came across this liquid blender cleanser in Boots funnily enough by 'Beauty Blender' themselves.

The Liquid Blender Cleanser is a soy based product free from dyes and skin irritants and comes in a handy squeeze down 150ml bottle which lasts and lasts, which makes it's £15 price tag a little less painful to contend with. The cleanser has a faint lavender scent to it and leaves your beauty blender, sponges and make up brushes (if you choose to use it for that) squeaky clean and free from germs, dirt and impurities. Disgusting as it may be during my weekly brush cleaning routine my favourite part is seeing just how dense and full of product my beauty blender is and squeezing out as much foundation as possible. Using this cleanser has been a real eye opener as to just how full of dirt and germs my sponge has been over these last few years! 

I use the cleanser once a week on all of the beauty blenders / make up sponges I'll have had on the go and I'm chuffed with the results I have been getting. I really feel as though it's better for my skin, better for my make up collection and I have found something that really works. My only qualm with the product is that it can get quite messy as you have to push the damp (and dirty) blender down on to the pump for the liquid to come out so you really need to put kitchen roll or a tea towel down to protect your counter. I also worry with this kind of pump at just how much product I'm wasting when it spills all over the place so it'd be great to get a different type of pump to distribute the product a bit better.

If you're as gross as me you'll love this product and you'll be so surprised at just how much foundation you're wasting away week on week! Beauty Blender also offer a solid blender cleanser which where it may indeed be a bit cleaner and easier to use will waste away very quickly as it dissolves like a regular bar of soap in water. Have you ever tried a specific blender cleanser product? How did you find it and did you just love seeing all the gunge come out like I do?  Leave your thoughts in the comments section below, come share the gunge and gore with me on Twitter or keep up with me and the blog on Instagram and Bloglovin.

Until next time folks, it's time to get gunged!

H.Elizabeth x

Wednesday, 5 October 2016

September in snaps | My month in instas


Can you believe it is that time of the month already?! Given all of the stresses and strains that faced us last month I genuinely thought we were in for another month of it as we officially bought and moved in to our own house, luckily we were to be pleasantly surprised and September has actually been a pretty fun month and we've got the snaps to prove it!

#1 Since we have already shared and probably sickened you of our new home tour video here's a snap of our Marble making herself at home. Making a house a home was something I was definitely worried about though once we brought Marble here it certainly felt more like home!

#2 Never a couple to do things in half measures we moved in to our new home and 2 days later hit the town and theatre for the Rocky Horror Picture Show at HMT Aberdeen. Needless to say we dressed up, feather boas, big hair, skirts, heels, the works! I do wish I could say it was the first time I had been wearing nothing but lingerie and a boa in a taxi but we both know I'd be lying! 

#3 This month I got my hands on so many fantastic products, the Urban Decay Waterproof Foundation, Make Up Geek x Manny MUA eyeshadow palette, Anastasia Beverly Hills Moon Child Glow Kit and some gorgeous goodies from the MAC X Star Trek 50 collection which as you all know I was super, super excited for. For my haul follow this link.

#4 After being asked, and asked, and asked again and again about my freckles, skin routine, foundation etc I drafted another insta post on my punum and shared this freckly to full coverage before and after picture.

#5 Having now well and truly welcomed Autumn into our lives in Aberdeen I felt so ready to embrace the season - but my wardrobe wasn't, so I treated myself to a brand new waterproof coat by Topshop and I just love it so much I had to share it with you all!

#6 After a little while of healing I was finally able to unveil my latest in a long line of tattoos, my skull by Lee and Rebel Ink. I am so in love with this tattoo and I think it may be one of the first I've had that I was 100% happy with instantly!

#7 Lush finally brought out their Halloween / Autumn collection of bath related goodies and I was lucky enough to get my hands on this delightful little dude. I haven't used him just yet but I'm so excited to bust them out for a big ole bath soon!

#8 I have pink hair now. After deliberating (for something like a week!) I decided that my blonde was getting a bit old hat for me and I wanted something a little different to brighten up my life....naturally pink hair by Saks and Manic Panic was the way to go!

#9 We attended our close friends engagement party this month in Dundee. We were so chuffed to celebrate with the happy couple at the end of September and all I can say is that wedding has one hell of a party to live up to when the day comes!

And that, as they say was that. I'm looking forward to what the month of October brings us in our brand new house, other than saving, scrimping and Halloween of course we don't have very much planned for the coming month so this is an advance warning of how dry my insta pics may be for next month! Of course you can catch me daily on the usual channels, Instagram, Twitter etc and more from the blog on Bloglovin.

Until next time folks, September sure passed in a snap.

H.Elizabeth x

Friday, 30 September 2016

Make Up Geek | Manny MUA Eyeshadow Palette Review

Before we jump in today I wanted to just give you a quick look at the inner workings of my mind, all in the name of getting to know me that bit better and you know understanding just why, WHY do I keep spending money?!? At first I wasn't going to buy the Manny MUA eyeshadow palette, despite being a fan of Manny, his You Tube channel, his fierceness and make up artistry skills I wasn't too worried about getting my hands on his palette when he collaborated with Make Up Geek earlier this year. That was until...Manny said the fateful few words that sealed my destiny.. and bank balance....'Selling out' and 'limited edition'.... I had bought the palette two days later and had it by the third....(if it were socially and bloggily acceptable I'd use the face slap emoji right here!) No matter, in the words of Lady Macbeth, 'what's done is done, now where my shadows at?!' (so I may be paraphrasing just a little)

Now despite what that length opening paragraph may have you believe I in no way feel remorseful about my purchase, it only took 2 minutes and one swift flick of that palette lid to dispel any feelings of the sort because....oh...my...god...how beautiful are these colours?! Made of a mix of pure Manny and a couple of Make Up Geek favourites I fell in love, head over heels if you will for some of the more unique shades. The first for example being Mars, a deep, matte, true red with a luxe look to it, the second being Insomnia, which is an existing Make Up Geek duo chrome shade that is a mixture of metallic reds, greens and blues which I cannot wait to use in a number of looks in the future.
Bottom left: Insomnia. Bottom Mid: Mars
Having now used the palette a couple of times I must say I have not been disappointed. Layered over the top of a cream base like a nude maybelline cream shadow, these colours really pop and don't crease after a few hours wear. Mars did not disappoint! Though it has a bit of kickback (as is the case with almost every highly pigmented red shadow) and I was very impressed with Insomnia (it's lovely as a dark, gothic halo eye) My only criticism would be that they stained my darn brushes, that's how pigmented I'm finding them! Seriously though I have had to wash my brushes after every time I use the shadows because otherwise they just transfer to my others. But hey, if that's my only qualm so far, I'll take it!

L-R: Artemis, Beaches & Cream, Luna, Cosmopolitan, Sora, Frappe, Insomnia, Mars, Aphrodite
Have you tried the Manny MUA palette or even shadows by Make up geek before? I would love to hear what you thought of the quality of their shadows and of course any colour or finish suggestions you'd like to throw my way! Hopefully you've enjoyed hearing how I have found the product and maybe it'll inspire you to go out and become a shopaholic I could be proud of! Of course you can catch me and my new palette on the usual channels, Twitter, Instagram and more from the blog on Bloglovin.

Until next time folks, feeling Manny marvellous.

H.Elizabeth x

Wednesday, 28 September 2016

Don't look I'm Naked (again) | Urban Decay Naked Skin Foundation Review


What could be more fitting than a foundation that keeps your skin looking like skin but better? Perhaps a good, and more millennial way of looking at it would be a filter for your face, or even face tune IRL! Well ladies and gents I may have found something for just that, the Naked Skin Foundation by Urban Decay.

Never have I ever been so obsessed with foundation, currently I have around five different bottles of the stuff open and on the go in different finishes, tones and of course all give me something different, matte, dewy, full coverage, light coverage, in fact in my own personal kit you may just find something for everyone. But if you're looking for the one, the one to see you through the lighter days, the fuller days, the matte or dewy days then you may just want to get Naked....

I first discovered the Naked range by Urban Decay when I picked up their much hyped concealer...then picked it up again...and then again, in fact guys, if I could I would just cover my face in that concealer and be done with it! So after hitting it off with their concealer I was so excited to try out the foundation. The foundation is described by Urban Decay as having a demi matte finish which offers luminosity, a flawless, airbrushed finish which also feels very light weight on the skin (weightless according to the bottle!) 

I picked this up in the shade 0.5 (the lightest in case you were wondering!) and at first I was mixing this with my tried and trusted Arbonne foundation, dotting it around sparingly and then blending it using a dampened beauty blender. This helped give me a true airbrushed, high coverage finish, dewy in all of the right places and is now my 'go to' party or evening look. However the Naked foundation on it's own I would say is a relatively medium coverage and offers a more dewy finish than a matte - which is great for my quite dry skin - but perhaps that is due to the way in which I am applying it (beatuty blender spritzed with MACs Fix+) I think this foundation also offers a radiance I haven't experienced with many other products and is complimented beautifully by the Naked concealer for highlighting dem cheekbones!

My only gripe about the foundation is that is has a very strong scent and if you don't use quite a heavy duty primer can feel a bit 'burny' on the skin on days where my skin is feeling a bit dry or sensitive (just a description guys don't worry I'm not burning my face on the daily!) However if you do have sensitive or very, very dry skin I would give this one a miss. I'm also a bit annoyed at the consistency of the foundation, I understand this all contributes towards the weightless feel of it on the skin however beware it may squirt at your face (fine it's going there anyway but you don't want that fear factor!)

Will I repurchase this foundation? Probably, I find it works quite well for me, particularly so when I mix it with my gentler Arbonne foundation. Though I have been working on this tube for a good while now with no signs of it finishing any time soon so I won't have to rush out to my local Urban Decay Counter any time soon.

Well guys again I hope you have liked my latest justification for spending so much money on make up post, I will be bringing you even more of these in the coming weeks so be sure to keep an eye out for those over on Bloglovin, read about the upcoming products I'll be buying and justifying over on Twitter or you can see my buyers remorse faces on Instagram.

Until next time folks, don't look now! I'm naked!

H.Elizabeth x

Friday, 23 September 2016

To Boldly Go Where No MAC Has gone before | MAC X Star Trek Haul


There aren't many MAC collaborations that excite me if I'm completely honest, Cinderella collection, I could take or leave, I wasn't enthused about Ellie Goulding particularly either and as for Brooke Sheilds... nah. But when I caught word of MAC's brand new Star Trek collection I was pretty over the moon (haaaa... see what I did there?) So of course, having been scorned before, I (boldly) decided to take my orders digital and get my MAC x Star Trek fix in a more futuristic fashion (online ordering folks..) And today, of course and as ever, I thought I would share my picks with you from the collection, or rather what my bank balance and stocks held by MAC would allow!


Trip the Light Fantastic Pressed Powder in Luna Lustre;
A soft rose shimmer highlight that looks so galactically good on your cheekbones!

Trip the Light Fantastic Pressed Powder in Highly Illogical;A blush or a highlight? The best of both (or all) worlds in this pan of golden, plum, rosy pearlescent powder.

Pressed pigment shadow in To boldly go...;A new, shimmery pressed pigment in a red / copper colour (so sparkly though, I can't wait to use this one in the Autumn / Winter months)

Lipstick in Where no man has gone before;So gorgeous and swirly in colour I almost don't want to use it! This looks golden in the bullet but when swatched gives off some beautiful pink / gold hues (rose gold lipstick ladies...ROSE GOLD!)

(L-R: Lipstick, pigment shadow, highly illogical, luna lustre)
Okay now MAC... you and I quite clearly need to have a sit down and a chat about your antics of this last year, you've put a strain on my bank balance, on my marriage... and worse still, on my make up bags...Now there will be no more collabs (until I can afford it) You will not pioneer or release the next 'must have' make up item, and no you will not tempt me with another lipstick...enough is enough! 

Were you lucky enough to pick up some goodies from this out of this world, galactic collection? What are your top picks I'd love to hear what you thought in the comments below, on Twitter and be sure to check out my latest 'looks' using these goodies on Instagram.

Until next time folks, I have boldly gone...where pretty much every MAC fan has gone before.

H.Elizabeth x


Wednesday, 14 September 2016

August in an Insta | My month in Instas

Admittedly I've done a lot of stressful things in my life, self inflicted. Back in 2014 I decided that yes, I could in fact complete my fourth year dissertation, graduate, change jobs twice, plan and action a wedding, and yes juggle this here blog in addition to all of that. Though nothing, I repeat nothing could prepare me for August 2016, aka, the most stressful 31 days of my entire life. First time buyers beware - I left two and a half months (after we found 'the one') and it still wasn't enough time for the banks, their solicitors or the letting agent to get their shins together! (Anyone fancy a scather of a review on any parties involved? Hit me or my very disgruntled Twitter feed up)

However we did have some good times this August, Nick and I celebrated two years of matrimonial bliss, I visited Livingston Designer Outlet (my favourite place on Earth - well in Scotland anyway) one of my besties celebrated her 29th birthday, I got inked (again) and we EVENTUALLY, closed on our dream home!


#1. (Sorry guys I can't remember if it was July but I'm going to count it as August) The girls and I (the girls being Sarah, Katherine, Laura and Julia) stayed at Skene House for a fun filled girls night where I not only enjoyed some fabulous company but one of the greatest sleeps of my life! To read more about my full Skene House experience follow THIS link.

#2 I died and went to heaven again this month with the fam. Heaven being Livingston Designer Outlet, where I got brand new goodies for our new home, hauled ass at French Connection and went a bit crazy at the Cosmetics Company.

#3 The girls and I got together once again this month to enjoy the culinary delights of the independent Books and Beans cafe in Aberdeen. You can again read my full review and expereice by following THIS link.


#4 I got inked... again...for like the 7th time. I haven't quite revealed my newest addition yet as it is still healing ever so slightly but stick around for the 'big reveal' soon to become a part of something even bigger  (if I have my way!)

#5 New products, new looks. I have been experimenting with even more new and different products this month, my favourite to do being the gorgeous purple eye you see above - super fast, super subtle and in real life, super sparkly.

#6 One of my besties celebrated her 29th birthday this month and I celebrated by embarrassing her with this throwback pic of the two of us 5 years ago. Shot glass necklaces? So on trend don't you know?

#7 Don't look I'm Naked. This month I discovered the Naked range by Urban Decay - already being a huge fan of their setting sprays and eye shadows it's safe to say they have now taken over my skin. I love using this alongside my tried and tested Arbonne foundation as well as my Naked concealer. Full review pending!

#8 For the many, many folks asking just why I wear foundation and 'cover my freckles' I posted a quickie before and after picture towards the end of this month showing the true struggle my skintone faces. Come rain, come shine that uneven patchy skin tone reigns supreme on my face and that ladies and gents is why I wear foundation (In actual fact I LOVE my freckles but just don't love my tone!)

#9 And finally I bought even MORE Kylie Cosmetics products - I have refrained from buying her eye shadow palettes I'm strictly a lippy lover!

Most of you will be aware if you've been on my Twitter or Facebook page that we do have a big life change a coming but due to set backs and various bodies dragging their feet (and brain cells) we have had to pop that on hold and that in case you were wondering, is why it does not feature in my August in an insta post this month. But stick around for September and I hope we'll be hitting the ground running!

And these were supposed to be short posts! Well guys as usual you can catch me on the channels I love so dearly, Twitter, Instagram, Bloglovin etc. Be sure to leave any and all (nice and polite) comments in the box below.

Until next time folks, August sure passed in an Insta!

H.Elizabeth x

Wednesday, 24 August 2016

BRB | Hitting the Pause Button


Ain't nobody got time for ANYTHING lately. Sorry guys I'm off on another blogging hiatus for a couple of weeks while we undergo another big, stressful life change. Thank you for bearing with, you can still keep up with my stresses, strains, moans and musings on the usual channels Twitter and Instagram of course. Keep an eye on the blog in a couple of weeks time for one of my first ever blogging competitions (did someone say MAC giveaway!?) keep an eye guys and I'll see you again very, very soon!

Until a few weeks time folks, BRB!

H.Elizabeth x

Wednesday, 17 August 2016

False Lash 101 | Cleaning your False Eyelashes


Since my first every post on my false lash obsession I've had a lot of questions, ranging from how do you put them on every day, where do you buy them, which brand has the best lash and perhaps my most asked question, 'can you reuse them and if so how do you clean them?' To which I usually quippily reply, 'you think I buy new lashes eryday, honey how much money do you think I have?' what a dedicated soul (large bank balance) you must think I have! So today I thought I would dedicate an entire post to how I do just that. Cleaning and caring for your false lashes. 

Given the proper cleansing routine and of course a steady and delicate hand your lashes should last you approximately 3 weeks (not of course accounting for nights out or big events which can make lashes decidedly gross and fit for the bin)  But before I get in to how to clean your lashes and store them properly I just want to mention a couple of things that have the potential to ruin your lashes before cleaning even begins. Removal. Removal of your lashes is key to keeping your false lashes AND your natural lashes in tip top condition, pulling, yanking, ripping or of course sleeping with them on even is a sure fire way to pretty much burn your money and wreck all of your lashes. So, no matter how tired (drunk) you are, how (much of a wimp) scared you are you must remove them before bed (and you know wash, cleanse, moisturise all that jazz) 

1) Carefully peel your lashes off , if they stick use an oil based make up remover and a cotton bud working from the outside inwards.

2) Using small tweezers pick any noticeable glue from the lash band and then bend them back into a 'natural eye shape'

3) If your lashes are looking a bit grotty (bleh!!) then spritz them with an alcohol solution and keep them in a clean dry place.

4) Store your lashes back in the tray they came in alongside the glue (bit of a practical move there!) and they'll be all ready and waiting for you next time!

Another tip would be to avoid using any mascara on your lashes, I realise people say they 'bind' the lashes and make them look more natural but when applied properly and right at the edge of the lash line I haven't noticed very much of a difference. Otherwise there isn't very much to it, you know treat them like your furry babies and make sure they're tucked in safe at night and that's about it! Hopefully this has cleared up any questions you may have had about your totally natural lashes (wink wink) but any questions for me be sure to leave them in the comments section below, come have a chin wag with me on Twitter, visit my Insta or keep up with my latests on Bloglovin.


                                                    Until next time folks, don't be a wimp!

                                                                          H.Elizabeth x


Friday, 22 July 2016

Building my Pro MUA Kit | FalseEyelashes.co.uk Haul

False eyelashes may be my biggest expenditure to date. Forget the MAC foundations and the Bobbi Brow liners, forget the Kylie lip kits and Too Faced eyeshadow, the real and greatest expense of being a make up artist comes from your disposables (so cotton pads, cotton buds, micellar water and baby wipes) But what's my biggest disposable? Lashes. Lashings and lashings of lashes. You see the thing with lashes is, once they're gone, they're gone. They aren't reusable, you can't cut a lash in half and use the other half for someone else (gross) so if you have 4 ladies needing a face, that is 4 pairs of lashes, roughly costing £20 - £25 if you use Eylure from Superdrug / Boots as I have. Naturally this couldn't continue if I wanted to continue pursing my Make Up Artistry career and I decided to go on the hunt for a cheaper similar quality alternative. 


That is when I discovered falseeyelashes.co.uk who not only stock my tried and tested Eylue lashes at a lower cost, but American / Canadian brands I was otherwise unable to get my hands on in Scotland. Ardell, Red Cherry, Peaches and Cream, Eyecandy and even Mink lashes (not sure how I feel about these) And not only is the website cost effective but the delivery was super quick too, I for example, placed an order on the Saturday night and received my lashes by Tuesday. With that in mind today I thought I would share some of the lashes I picked up in my first ever pro false lash haul.

Ardell Demi Wispies Multipack (4 pairs for £11.99)
If you're a beauty blogger or watch a lot of beauty you tubers then you'll have seen these lashes kicking about pretty much every where. The Demi Wispies are Ardells most popular lash and it's not hard to see why. They're textured, they're lengthening and they'll really help open up your eye as they fan out towards the sides which I love! As you can see I picked up two of these as I can see these being a very popular choice with the girls who visit me in Blush.

Ardell 105 Glamour Multipack (4 pairs for £11.99)
For the bold and fearless ladies looking for a bit more glamour in their lives! These lashes are super long, super full, super voluminous and will be really lovely for those ladies who are heading for a night on the town. 

Eylure Lash Edit - Paris Set (3 pairs for £6.95)
Okay admittedly these are sort of for me, but of course if someone spies them in my kit and wants to give them a good go, then I will not stop them (I may cry but we'll carry on!) These ones are a bit cheaper than the New York set (RRP £9.95) but I don't know why. You get good day lash, a good voluminous evening lash and of course something for those in between moments. These would be classes as lengthening and voluminous as opposed to textured, great for when you've got minimal eye make up but still want to make a statement.

Red Cherry Lashes (Complimentary gift)
With my order came these Red Cherry Lashes which the company must be trying to shift, but hey I'm not complaining I got free lashes! I have never tried Red Cherry personally but I have seen a lot of beauty based You Tubers who have used them in tutorials so I'm looking forward to giving these a go regardless.

Hopefully ordering this way and trying, experimenting and using new styles means I will find something a bit more appropriate for my kit and of course something that the ladies in my chair will love! As for you lovely lot I hope you have enjoyed this post, leave a comment below telling me what you favourite style of lashes are or your favourite brand and I'll be sure to check those out during my next haul. As per I'm on the usual socials, Twitter, Facebook, Instagram and more from the blog on Bloglovin!

Until next time folks, lashes so long!!!

H.Elizabeth x

Friday, 8 July 2016

Summer Make Up Woes | How to Hayfever Proof your make up


You guys know if you've been here long enough that I am a hardcore hayfever sufferer. Eyes, nose, throat, even my hair follicles can feel when pollen is in  the air. Fortunately for me I thought I had escaped it this year... unfortunately I was kidding myself and I was once again struck down by the summer sickness literally on the first official day of summer. Now please, before you leave your seemingly helpful comments on how to rid yourself of the dreaded disease go and read THIS post which I wrote last year, really guys I HAVE tried everything. But today I wanted to do a shout out and a bit of a helpful post for all of you fellow hayfever sufferers, I'm looking at you with the streamy eyes, runny noses and red raw faces, on how to best smudge, sneeze and hayfever proof your make up.

Go hypo-allergenic wherever possible
Now no this won't prevent your nose itching or eyes streaming but it will give your immune system more of a fighting chance and gives you less to react to should anything accidentally happen to fall into your eyes. Vichy provide a good range for sensitve skin and all sorts of coverage options.

Wear waterproofs
Nope don't start donning those jackets and wellies just yet we just need to opt for a waterproof mascara. Ideally apply this in the morning after washing your face so you're not getting pesky pollen particles on the wand thereby compromising the integrity of your formula (how posh was that?) The mascara will stay on even if your eyes are water buckets that day.

Invest in a cooling eye gel
Whenever I walk to work in the summer I find when I arrive my eyes are a hot, puffy mess. So my solution is to keep a cooling eye gel in the fridge at work and apply it when you arrive, you can opt for a tinted one like the garnier roller ball or a clear one such as the Body Shops elderflower eye gel. You'll get a lovely cooling sensation and you'll look a lot more human which is always a plus, but if you're in a pinch you could always use the back of a teaspoon to de-puff those peepers. 

Shower at night before going to bed and wash your face in the morning
Excessive as it might seem for many, if you go to bed with pollen particles all over your face and body you'll simply sleep in them all night, get a terrible sleep, wake with sore puffy eyes and runny noses, you'll probably even just not go in to work and lose your job...Just kidding! But you'll feel rotten, make sure you're going into a clean, pollen free pit at night and wash your face in the morning just to make doubly sure.

Conceal that blotchyness
Sometimes my face resembles a slice of corned beef in summer. You guys know how it gets when you've been rubbing, wiping and rubbing all day and suddenly you look as if you've been crying for a thousand years. Grab yourself a colour correcting palette and cover those red patches with a pale green concealer. Make up lovers will know that green combats the appearance of redness, blend that in with a damp beauty blender and cover with regular concealer and foundation as usual. Be gone blotches!

I can't tell you this will magically make you look 100% human again but it's a start, hang in there fellow hayfever-ites and hayfever-ettes Autumn will be here before you know it and we'll get through this together.

What are your top hayfever / summer make up survival tips? Be sure to leave all of your tips and comments in the section below, come tell me how to stop my eyes watering on Twitter, Instagram, Facebook you name it! 

Until next time folks, ugggghhhh (the universal sound of hayfever sufferers!) 

H.Elizabeth x

Wednesday, 6 July 2016

Send Nudes | My Nude Lipstick Collection and Swatches

Nudes are all the rage right now. Nope, put that phone down ladies I'm talking about nudey lips (though if you're Kim K nudes are ALWAYS the rage in your house) and over these last few months I've built up quite an extensive collection of nude lipsticks, glosses of all shapes, sizes, finishes and price ranges and today I wanted to share with you a few of my top picks from my pro make up artistry collection and of course ones from my own personal make up bag.

Swatches L-R: MAC Half N Half, MAC Blankety, Maybelline Colour Drama in Nude Perfection, Revlon Matte Balm in Mischievous, Too Faced Melted Matte in Nude, NYX Lip Cream in London, Kylie Cosmetics in Dolce K, Kylie Cosmetics in Exposed, Kylie Cosmetics in So Cute.
MAC Amplified Creme in Half N Half
Half N Half was one of the first shades by MAC I ever bought, way before the days of the Velvet Teddy reign I was rocking my good old half n half. This one is a bit darker than my other nudes and is perhaps verging on a more brown shade for us pale girls, but on a darker skin tone this would be perfection. The finish of this one is an amplified creme, so it's very creamy and quite heavy on the lips and what's great is it won't dry out your lips, great for those winter months (when they eventually roll in)

MAC Amplified in Creme Blankety
Blankety is one of my staple staple favourite. Whenever I don't know what to wear I'll always reach for blankety for comfort (ha I know!) Blankety again has a lovely creamy texture and consistency and is much lighter than it's sister Half N Half. I often use Blankety to lighten up the mid section of my lip and pat it out to give myself that 'ombre' lip, it also helps make your lips look fuller and bigger which we new age make up lovers of course all die for!

Maybelline Colour Drama lipstick in Nude Perfection
This one is perhaps the most affordable of the bunch and is one of the most surprising. Whenever I apply this shade it lasts all day! And as far as I am aware that isn't part of the major selling point, in fact I don't even think these have been to widely advertised. This shade is literally what it says on the packaging, nude perfection and is a great starter nude for you dabblers out there. My only criticism is the size is really quite small and you also have to invest in a large sided pencil sharpener just to get additional uses.

Revlon Matte Balm in Mischievous 
These matte balms are worth a look in for the forumla alone, which contains peppermint extract and leaves your face smelling minty fresh! If I could bathe in this I would! I use mischievous again to create ombre looks the majority of them time and it's a nice, blend-able, light shade which also doesn't feel drying.

Too Faced Melted Matte in Nude
The applicator for this is not great for hygiene and hence I do not stock them in my pro kit, which is a real shame because they are gorgeous. I wouldn't technically say that this was a particularly matte lipstick, it semi dries but not entirely. The finish however has a very tacky, strobed look and again is great for summer. It is quite a warm nude, even warmer than the Kylie Exposed kit so I usually pair this with a cool toned eye just to balance out the face.

NYX Soft Matte Lip Cream in London
One of my brand new babies from the brand new NYX counter in my local boots, I've been loving the finish of this lip cream, it feels more like a light soufflé finish than an actual cream which is lovely for summer when you want to feel a bit lighter. The shade itself is quite light with what I would say is a hint of orange very similar to the Too Faced melted matte shade. You do have to top NYX up quite a bit through the day but as they're high street I'm not complaining and it's a gorgeous shade!

Kylie Cosmetics Lip kit in Dolce K
I won't go into too too much detail about Dolce as you can read my full review and first impressions of it right here. 

Kylie Cosmetics lip kit in Exposed
First of my many, many mattes is the Kylie Cosmetics lip kit in Exposed. Exposed is a toffee / caramel shade which is unlike most other colours on the market. On darker skin tones it is a gorgeous cool, light colour, however on myself it is far warmer in colour and helps bring a bit more depth and dimension to my moon face. This is not perhaps one to dabble with if you're new to using nude colours on your lips as it can be quite intense but I cannot fault the formula it is beautiful!

Kylie Cometics lip gloss in So Cute
So Cute is the most versatile colour I have ever used it's gorgeous and this summer I would not be without it. It looks exactly as it did on the Kylie Cosmetics website and can be layered over the top of just about any colour to give your look an extra oomph. But I genuinely just love wearing this on it's own with a pared back eye and subtle contour for a great summer barely there look.

For all of you nude connoisseurs and nudey newbies I hope you found this post helpful, informative, entertaining or maybe I've even just inspired you to get out there and spend some pennies (go on treat yo self!) What are your favourite nude shades? I'd love to hear them in the comments below, come link them to me on Twitter or if you're just interested in seeing these nudes in action be sure to check out my Instagram and Facebook pages.

Until next time, let's get naked!

H.Elizabeth x 

Friday, 1 July 2016

A Tale of Two Faces | The Power of Make Up

Last weekend I ran out of one of my favourite brow products. No problem though, right? Well, I was slap bang in the middle of filming my first ever You Tube video, typical right, oh and did I mention I was only able to finish one brow before I found myself in this predicament? So with a heavy heart I shut off my camera and packed up my wares, to film another day, but instead I took the opportunity to be a little two faced, nah I wasn't having a rant and a moan behind my beloved MACs back, I mean I quite literally took the opportunity to be a little two faced.

I've seen a lot of bloggers, vloggers, instagrammers and tweeters doing this challenge entitled 'The Power of Make Up,' where you make one half of your face up and leave the other half bare as a baby. The challenge was pioneered by Nikki Tutorials in order to get folks thinking about make up, why they wear it , how it makes them feel as a person and to show that us gals aren't making ourselves into gorgeously glittery glamazons for no guy. I mean PLEASE I ain't buying a £60 palette and painting my lids purple for anyone but my own enjoyment!


To me make up, as many before and many more after me will say, is a form of expression, a form of control and an opportunity to transform not just your appearance or aesthetic, but your entire mood and outlook on life even if just for a day, an hour, hell half an hour, if it makes me feel good then I'll be doing it on the daily! From that self concious 14 year old girl and her first ill advised purchase of a Rimmel mascara that I couldn't work out how to use without going all panda eyed, to me today, a far more confident, life owning girl boss......still making ill advised purchases but luckily I'm a lot less panda.

So guys I'd love to hear your stories! How does make up make you feel? Do you feel all nostalgic over your first ever purchases? Be sure to leave all of your thoughts, word vomit and brain farts in the comments below, come share your selfies with me on Twitter, Instagram, Facebook even (where could be more appropriate?

Until next time folks, what can I say? I'm a little two faced after all!

H.Elizabeth x

Wednesday, 29 June 2016

Eye Define | Bobbi Brown Long Wear Gel Eyeliner Review

Bobbi Brown Review

Back in the day pencil eyeliner was my go to, though I do think I've been through every phase under the sun throughout the years, liquids, creams, pencils, bright colours, dark colours, mattes, shimmers, you name it I've wore it! But today I want to share with you my latest liner obsession and that is the Bobbi Brown Long Wear Gel Eyeliner. 

Currently I stock two colours in my kit, black ink which is a beautiful blacker than black shade and sepia ink which is a dark taupey brown which is great when trying to create a more 'natural' look (fab for brides!) and given just how much I have fallen in love with these I'm excited to buy more. The liners themselves come in small pots with 3g worth of product inside, but believe me when I say that a little goes a very long way. 

To apply these I use a damp tapered brush, typically my weapon of choice is the winged liner brush by Zoeva which came as part of my taupe collection. I start by painting my outer corner in short even strokes right at the root of the lash line and then working my way inwards and finishing off by tight lining my eye. By doing this I find the forumla goes on evenly and if necessary I'll wipe the excess off of the brush using a piece of kitchen roll before going near my eye. If used on the waterline which I rarely do, this last all day and according to claims can last as long as 12 hours on the eye (though I rarely wear make up in excess of 12 hours)The gel formula has helped me create perfect feline flicks faster than any forumla previously and doesn't smudge like most other liners do. This liner is perfect for ladies and gents who love the look of a liquid liner but don't want the smudging, running or hassle of application. 

At present I can't see myself needing anything more from an eyeliner than what these already give me, my only gripe in fact is that I don't have more colours!These pots retail at £18.50 each which sounds steep in comparison to high street brands but this will not only last all day but the pot will last you months guaranteed! You can buy these at any Bobbi Brown counter worth their salt in most Debenhams or John Lewis stores up and down the country.

Have you ever tried these gel liners? I'd love to hear how you found them, be sure to leave all your thoughts, comments and criticisms in the comments down below, perhaps you've found something EVEN better than Bobbi, I love getting your recommendations! As usual though you can catch me making faces on the usual channels Twitter, Instagram, Facebook and of course more from the blog on Bloglovin.

Until next time folks, nothing beats Bobbi!

H.Elizabeth x
Blogger template by pipdig